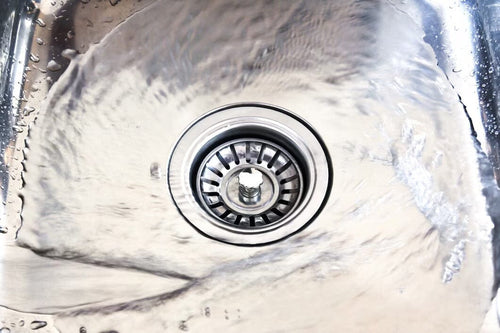
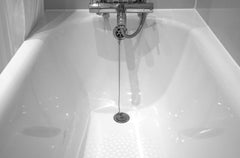
A stuck drain stopper in your bathtub can turn a simple bath into a frustrating experience. It’s one of those issues that sneaks up on you, leaving you standing in ankle-deep water until you muster up the courage to fix it. Many people often overlook this small yet annoying problem until it seriously demands attention. Acting swiftly can save your drain—and your sanity. Keeping your drain clean and functional is vital for smooth daily use and prevents more severe plumbing problems.
Have you ever tried pulling out a drain stopper only to be met with resistance? You're not alone. Over time, these stoppers can become stiff or jammed due to accumulated debris like soap scum and hair. Regular maintenance and the right cleaning techniques ensure that your bathtub's drainage system works smoothly and efficiently. Let’s unravel the process of dealing with this pesky problem head-on, making your bathroom upkeep feel less daunting.
Tools You Will Need
Tackling the challenge of a stuck drain stopper starts with having the right tools on hand. Here’s a simple list to get you prepared:
- Screwdriver: Essential for removing screws from the stopper or drain flange.
- Needle-nose pliers: Handy for gripping and tugging delicate parts without damage.
- Drain snake: Useful for reaching and clearing blockages.
- Cleaning cloth: For wiping down parts and areas.
- Bucket or container: To collect water or any debris during the process.
Safety precautions are key before diving into this task. Make sure the area is dry to avoid slips and wear gloves to protect your hands from any sharp edges or grime. Also, it’s helpful to have some basic knowledge of your stopper type, whether it’s a push-and-pull, lift-and-turn, or toe-touch. This way, you can choose the right method for removal and cleaning, avoiding unnecessary struggle or damage.
Having these items ready can make the process smoother and less stressful, letting you focus on restoring your drain to tip-top condition without any unnecessary complications. Preparing now means fewer surprises later, ensuring you're fully equipped to handle the task ahead.
Step-by-Step Guide to Removing a Stubborn Drain Stopper
Dealing with a stubborn drain stopper can be frustrating, but breaking the process into manageable chunks will make it easier. Here's how you can handle different types of drain stoppers with ease:
1. Push-and-Pull Stopper:
- Begin by setting the stopper in the "open" position.
- Firmly grip the stopper and turn it counterclockwise. If it's hard to twist, lightly wiggle to loosen it.
- Use a flat-head screwdriver if needed, applying gentle pressure to release any hidden screws.
2. Lift-and-Turn Stopper:
- Lift the stopper to access the small screw at its base.
- Use a screwdriver to unscrew, then gently lift the stopper off.
- If stuck, use a pair of needle-nose pliers for additional leverage but be cautious not to damage the stopper.
3. Toe-Touch Stopper:
- Press down on the stopper as if closing it, then release to unlock its mechanism.
- Twist the cap counterclockwise and lift it off to reach the housing.
- Carefully use a screwdriver or pliers to disconnect any securing screws.
Encountering resistance during removal is common. A little patience goes a long way. Consider using a drain snake if you suspect debris causing the stopper to jam. Work slowly, focusing on precision to avoid damaging your drain's components.
Cleaning Your Drain Stopper
Once your stopper is successfully removed, giving it a proper clean is the next step. Allowing grime to build up not only impairs the function but leads to unpleasant odors.
- Start by rinsing the stopper under warm water, scrubbing with a soft brush to remove soap scum and hair.
- If you spot mineral deposits, soak the stopper in a vinegar solution for about 15 minutes. Vinegar acts as a natural cleaner to break down stubborn buildup.
- For trapped debris and tight spots, use a toothpick or an old toothbrush to reach nooks and crannies.
Maintaining cleanliness prevents future blockages, so aim to check and clean your stopper periodically. A sparkling clean stopper means no more unexpected clogs and a smoother flow.
Reinstalling and Maintaining Your Drain Stopper
After cleaning, reinstalling your stopper ensures your bathtub is back to full function. Pay attention to the stopper type as each has its own quirks.
- Align the stopper correctly with the drain opening.
- Secure any screws snugly, but avoid overtightening to prevent the sink flange from cracking.
- Test the movement several times to confirm it opens and closes smoothly.
Regular upkeep is your best defense against clogs. Make it part of your routine to remove the stopper regularly for a quick rinse. This proactive step means no more surprises and your bathtub looks and works its best.
Wrapping Up Your Drain Stopper Maintenance
Addressing a stubborn drain stopper doesn't have to be a hassle. With the right approach and tools, you can handle it easily. Regular care and maintenance will keep your bathtub's drainage system in good working order, minimizing the risk of future issues. Remember, to prevent hair and other debris from creating blockages, consider using a hair catcher designed for easy installation and maximum effectiveness.
By keeping these steps in mind, you'll ensure that your bathtub remains reliable and stress-free. So take charge of your bathroom maintenance, ensure everything runs smoothly, and enjoy those relaxing baths without any worries about the drain. It's your first step to a consistently great bath experience.
Ensure your bathroom upkeep is seamless and stress-free with the right tools on hand. When you're ready to tackle those pesky stoppers, turn to The Shroom Company for high-quality solutions. Discover how our products can assist you and learn more about how to easily remove drain stopper efficiently. With our help, keeping your bathtub in perfect working order is just a step away.

0 comments